To use a liquid aquarium test kit, first gather the necessary components, including test solutions and glass test tubes. Prepare by checking expiration dates and familiarizing yourself with the instructions. Collect a water sample near the surface in a clean test tube, filling it to the indicated line. Add the specified reagent drops for testing, then compare the resulting color against the provided card. Record results to monitor trends over time for ideal aquatic health. More techniques for effective water management await.
Key Takeaways
- Verify the expiration dates of reagents and ensure you have the correct test kit for your water type (freshwater or saltwater).
- Collect a water sample using a clean test tube, filling it to the indicated line for accurate test results.
- Follow the testing procedure by adding specified reagents, mixing gently, and comparing the sample color against the color card under good lighting.
- Document the results, recording numerical values for pH, ammonia, nitrite, and nitrate to track water quality over time.
- Regularly test water parameters, adjusting management practices based on results to ensure optimal conditions for aquatic life.
Components of a Liquid Test Kit

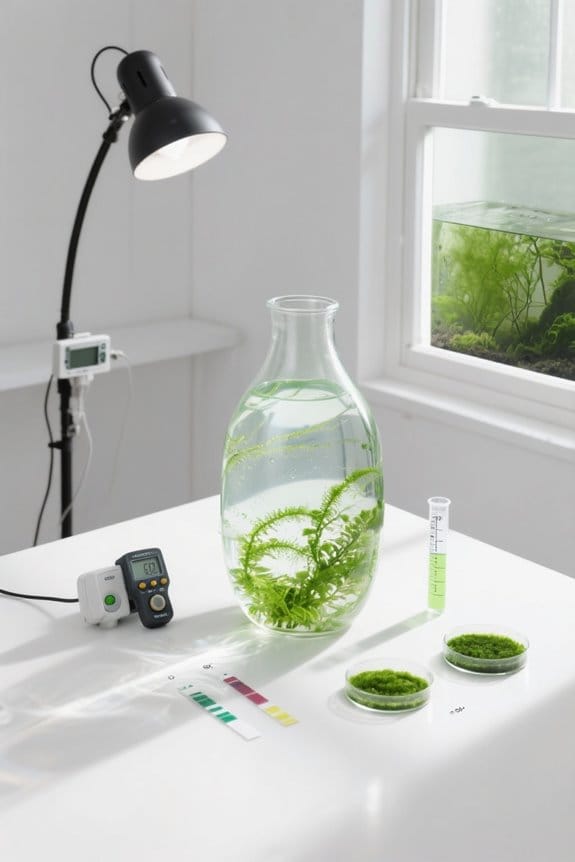
A liquid aquarium test kit is essential for maintaining a healthy aquatic environment, as it provides the tools needed to assess various water parameters. This kit typically contains multiple test solutions designed for measuring critical factors like pH, ammonia, nitrite, and nitrate. It often includes glass test tubes for sample collection, ensuring precision in measurements. Accompanying the test solutions are high-quality reagents, which are crucial for reliable results. Users will also find a color comparison card, simplifying result interpretation with clear visual cues. In addition, a sturdy carrying case protects and organizes all components, making accessibility easy. For best use, refer to the detailed instruction manual included in the kit to guide proper testing procedures. Regular testing enables early identification of water quality issues, ensuring timely adjustments for optimal fish health.
Preparation for Testing

Preparing for water testing requires careful attention to detail to secure accurate results. First, verify the expiration date of all reagents included in your test kits; expired reagents can lead to unreliable readings. Next, familiarize yourself with the kit’s components, such as test tubes and the color comparison card, and read the instruction manual thoroughly. Take particular note of the specific instructions for each parameter you intend to test, as methods may vary. Differentiate between freshwater and saltwater kits; confirm you’re using the correct one for your aquarium type. Additionally, prepare your workspace by keeping your equipment dry and avoiding testing near colored lights. This preparation secures the most reliable results from your aquarium test kits. It is important to choose kits that test a variety of parameters for comprehensive water quality assessments, ensuring you address all potential contaminants.
Water Sample Collection

Water sample collection is vital for obtaining accurate test results in an aquarium. To guarantee ideal results, collect the water sample near the surface to minimize disturbance to the fish and avoid displacing substrate. Utilize a clean test tube, filling it to the indicated line for precise measurement. Carefully handle all testing equipment to maintain the integrity of the sample and prevent any contamination. For best results, use the collected sample immediately to avoid changes in water chemistry, which can occur during prolonged storage. It is essential to note the specific parameters you intend to measure, as each test will require its own dedicated instructions. Regular water changes can help maintain a healthier environment, making sample collection even more essential. Ammonia test kits can detect levels as low as 0.25 ppm, which is crucial for effective monitoring of water quality.
Testing Procedures

Begin by assembling all necessary materials for testing, which should include the liquid test kit, a clean test tube, and the specific reagents required for the chosen test type. For drop tests, carefully add the instructed number of drops of reagent to the water sample in the test tube, cap it, and shake gently as directed. For titration tests, follow the sequential addition of reagents and titrate dropwise until a color change occurs, counting each drop for accuracy. After testing, consult the conversion chart included in the kit to determine parameter concentrations. Compare the tested sample’s color against the color card under appropriate lighting to guarantee the best results. Finally, document the outcomes to track water quality over time. For those interested in testing water hardness, the API GH & KH Test Kit is specifically designed for measuring General Hardness (GH) and Carbonate Hardness (KH), important for understanding water chemistry in freshwater setups.
Analyzing Test Results

Analyzing test results requires careful attention to detail, as the health of the aquarium depends on accurate assessments of water parameters. Begin by matching the color of your sample in the test tube to the color comparison chart included in your test kit. Document numerical values for pH, ammonia, nitrite, and nitrate; for instance, maintain a pH between 6.5 to 7.5, with ammonia and nitrite at 0 ppm, and nitrates below 20 ppm. Consistent test results indicate a stable environment, but sudden changes may need immediate action. If elevated ammonia or nitrite levels arise, perform water changes or consult for filtration improvements. Always compare your results against ideal ranges to verify exemplary conditions for your aquatic life. For comprehensive water quality assessment, consider using kits like the API Freshwater Master Test Kit, which provides thorough analysis across multiple parameters.
Best Practices for Accurate Testing
Accurate testing is critical for maintaining a healthy aquarium. To achieve precision, always use fresh reagents, checking expiration dates before each test. Conduct testing in a well-lit area, steering clear of colored lights, as they can distort color comparisons. Clean and dry all equipment thoroughly to prevent any contamination that might skew results. Additionally, follow the specific instructions in your testing kit manual, as procedures may vary based on the parameter being measured. Finally, consistently log test results to track changes in water quality, which aids in effective aquarium management. By adhering to these best practices, aquarists can guarantee reliable results, ultimately fostering a thriving aquatic environment. Many kits, such as the API Freshwater Master Test Kit, are highly rated for their accuracy and ease of use, making them a reliable choice for consistent water monitoring.
Common Water Parameters to Measure
Maintaining a thriving aquarium requires frequent testing of key water parameters, as these measurements are essential for ensuring the health of fish and aquatic life. First, monitor pH levels, ideally between 6.5 and 7.5; this range supports the wellbeing of most freshwater species. Next, check ammonia levels, which must remain at 0 ppm—any presence can lead to poisoning. Similarly, nitrite should also be at 0 ppm to prevent adverse health effects, such as brown blood disease. Finally, keep an eye on nitrate levels, aiming for below 20 ppm to reduce stress and control algae growth. Accurate CO2 monitoring is also vital for maintaining the health of aquatic plants and fish, ensuring optimal growth conditions. Regular testing of these aquarium water parameters fosters a safe and balanced environment, benefitting both fish and plants.
Understanding Ph Levels
pH is a critical factor in aquarium health, as it directly affects fish well-being and biological processes. pH levels range from 0 (acidic) to 14 (alkaline), with freshwater fish typically thriving at a neutral pH of 7. To maintain ideal conditions, regular pH testing is essential; fluctuations can cause stress, impacting fish health. New aquariums experience shifts in pH due to biological activity, necessitating frequent testing—daily or weekly initially, then monthly once stabilized. Monitor carbonate hardness (KH), which buffers pH levels against rapid changes. Consistently high or low pH readings may indicate problems like overstocking or poor filtration, requiring immediate corrective measures to safeguard aquatic life. Regular pH management is essential for sustaining fish health and reducing stress, as imbalances can lead to unhealthy aquatic environments. Knowledge of pH levels empowers aquarists to foster a balanced, thriving ecosystem.
Managing Ammonia Levels
Ammonia levels are a significant consideration in maintaining a healthy aquarium ecosystem. Regular testing is essential, particularly in new tanks, where ammonia spikes can occur as biological filters establish themselves. Aim to maintain ammonia levels at 0 ppm to safeguard fish health. Symptoms of ammonia poisoning, such as heavy breathing and clamped fins, underscore the importance for prompt management. To reduce elevated ammonia levels, conduct partial water changes of 25% weekly, enhance aeration through air stones, and consider ammonia-removing products like Seachem AmGuard. Test ammonia levels after water changes or introducing new fish to prevent spikes, fostering a stable environment that minimizes stress on aquatic life. Consistent monitoring guarantees a flourishing aquarium. Regular testing prevents major water quality issues before they arise, and helps maintain a healthy environment for aquatic life.
Monitoring Nitrite Levels
How can one guarantee a stable and thriving environment in an aquarium? By diligently monitoring nitrite levels. Regular testing is essential, as favorable nitrite levels should remain at zero for fish health. Nitrite, a byproduct of the ammonia cycle produced by nitrifying bacteria, poses serious risks to aquatic life if not managed. Symptoms of nitrite toxicity include lethargy, gasping at the surface, and swimming difficulties due to brown blood disease. To test accurately, utilize liquid test kits designed for nitrite evaluation, carefully following the manufacturer’s instructions. Frequent monitoring, especially in newly established tanks or after overfeeding, prevents nitrite spikes, ensuring ideal water conditions for the aquarium’s inhabitants. Take proactive measures to maintain these critical water parameters. Regular testing allows for identification of elevation or decline in phosphate concentrations, ensuring overall tank health.
Keeping an Eye on Nitrate Levels
Maintaining healthy nitrate levels is essential for the overall well-being of an aquarium’s ecosystem. Regularly test nitrate levels at least once a week, particularly in newly established tanks or after introducing new fish, ensuring levels remain below 20 ppm. High nitrate levels can stress fish and lead to detrimental algae blooms. To manage nitrate accumulation, which occurs from fish waste and respiration, perform regular water changes. Consider incorporating live plants or nitrate-reducing media, such as nitrifying bacteria products, to naturally lower these levels. Monitoring nitrate levels diligently will help maintain a stable, healthy environment, fostering a vibrant aquatic community and preventing water quality issues that could harm your fish. Keep nitrates in check for a thriving aquarium.
Tips for Maintaining Water Quality
Ensuring ideal water quality is a cornerstone of successful aquarium management. Regularly test water parameters like pH, ammonia, nitrite, and nitrate, as this helps maintain safe levels for aquatic life. For freshwater and saltwater systems, established tanks should be tested monthly, while new setups require more frequent checks. Aim for a pH between 6.5 and 8.5; fluctuations can stress fish, especially after water changes. Keep ammonia at 0 ppm to prevent toxicity, as symptoms include heavy breathing. Monitor nitrite levels closely, ensuring they remain at zero, since even low levels can cause brown blood disease. Lastly, carry out regular water changes to control nitrate accumulation, keeping levels below 20 ppm to reduce stress and limit algae growth.
Frequently Asked Questions
How to Use an Aquarium Water Test Kit?
Testing aquarium water requires precision; studies show that common mistakes, such as using expired reagents or improperly collecting samples, can lead to a 50% decrease in accuracy. Regular testing guarantees ideal aquatic health and longevity.
How to Read an API Test Kit Correctly?
To read an API test kit correctly, accuracy is paramount. After proper sample collection and reagent addition, mixing and waiting enhances test accuracy. Finally, comparing color against the chart guarantees precise parameter concentration assessment.
How Many Drops of KH Test Solution?
For the KH test, five drops of the test solution are typically added to the prepared water sample. This guarantees accurate carbonate hardness measurement, as results depend on thorough mixing and adherence to specific testing instructions.
How to Use a Water Quality Test Kit?
To monitor water quality effectively, one should test frequently. Gather necessary components, collect a surface water sample, follow instructions for adding reagents, and compare results against a color chart for accurate assessments. Always stay ahead of potential issues.